This is the service procedure on a 2007 Corvette. Same procedure for ours.
************************************************** *************
Testing and Inspection
Transmission Fluid Checking
This procedure checks both the transmission fluid level, as well as the condition of the fluid itself. Since the transmission on this vehicle is not equipped with a fill tube and dipstick, a tube in the bottom pan is used to set the fluid level.
Notice: The transmission fluid level must be checked when the transmission fluid temperature (TFT) is between 30-50°C (86-122°F). If the TFT is not within this range, operate the vehicle or allow the fluid to cool as required. Setting the fluid level with a TFT outside this range will result in either an under or over-filled transmission. TFT>50°C =under-filled, TFT<30°C =over-filled. An under-filled transmission will cause premature component wear or damage. An over-filled transmission will cause fluid to discharge out the vent tube, fluid foaming, or pump cavitation.
1. Observe the TFT using the driver information center (DIC) or a scan tool.
2. Start and idle the engine.
3. Depress the brake pedal and move the shift lever through each gear range. Pause for at least 3 seconds in each range. Move the shift lever back to PARK. Ensure the engine RPM is low (500-800 RPM).
4. Allow the engine to idle for at least 1 minute.
5. Raise the vehicle on a hoist. The vehicle must be level, with the engine running and the shift lever in the PARK range.
Notice: THE ENGINE MUST BE RUNNING when the trans oil level check plug is removed or excessive fluid loss will occur, resulting in an under-filled condition. An under-filled transmission will cause premature component wear or damage.
Important: Continue to monitor the TFT. If the TFT is not within the specified values, reinstall the trans oil level check plug and repeat the previous steps.
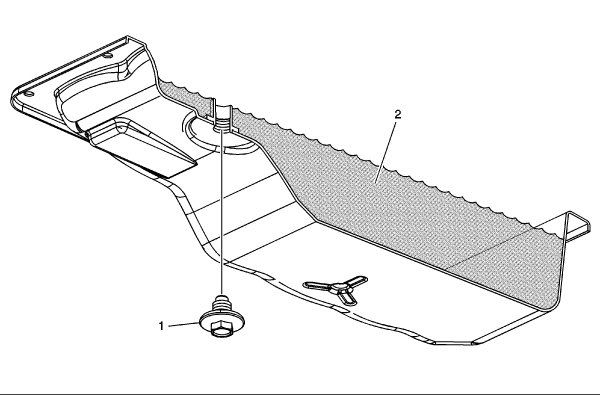
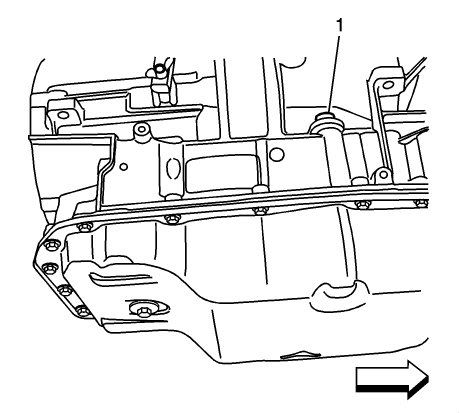
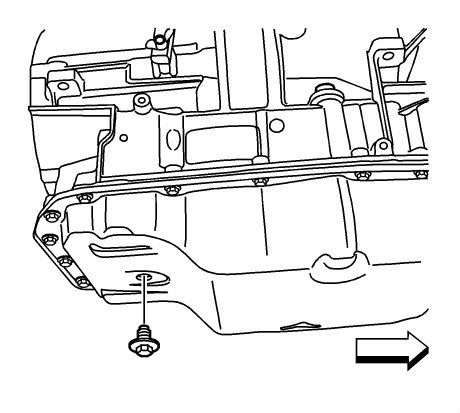
6. Remove the trans oil level check plug (1) from the transmission fluid pan. Allow any fluid (2) to drain.
If the fluid is flowing as a steady stream, wait until the fluid begins to drip.
If no fluid comes out, add fluid until fluid drips out.
7. Inspect the fluid color. The fluid should be red or dark brown.
If the fluid color is very dark or black and has a burnt odor, inspect the fluid and inside of the bottom pan for excessive metal particles or other debris. A small amount of "friction" material in the bottom pan is a "normal" condition. If large pieces and/or metal particles are noted in the fluid or bottom pan, flush the oil cooler and cooler lines and overhaul the transmission. If there are no signs of transmission internal damage noted, replace the fluid filter assembly, repair the oil cooler, and flush the cooler lines.
Fluid that is cloudy or milky or appears to be contaminated with water indicates engine coolant or water contamination. Refer to Engine Coolant/Water in Transmission. See: Testing and Inspection\Symptom Related Diagnostic Procedures\Engine Coolant/Water in Transmission
8. Replace the trans oil level check plug and tighten to 25 N.m (18 lb ft).
9. Inspect for external leaks.
10. Reset the oil life monitor only if the fluid was changed.
Transmission Fluid Fill Procedure
Notice: Use Dexron VI transmission fluid only. Failure to use the proper fluid may result in transmission internal damage.
Perform this procedure for vehicles with transmissions that are not equipped with a fill tube and dipstick. Based on accessibility, transmission fluid may be added through the fluid fill tube plug assembly (1) hole or through the oil level check plug (2) hole in the bottom of the transmission fluid pan.
Tools Required
DT 47784 Transmission Fluid Fill Pan Adapter
J 45096 Transmission Oil Cooling System Flush and Flow Test Tool
J 45096-30 Transmission Cooler Flush Adapters
J 45096-40 Transflow Oil Fill Adapter
Fill Tube Plug Method
Notice: Before removing the transmission fluid fill tube plug assembly, thoroughly clean around the plug to prevent dirt or contaminants from entering the transmission during plug removal. Use compressed air to dislodge any caked dirt that may be stuck on and around the plug area. Use a mirror to confirm the area is free of dirt before removing the plug. Failure to clean around the plug may result in transmission contamination.
1. Clean around the fluid fill tube plug.
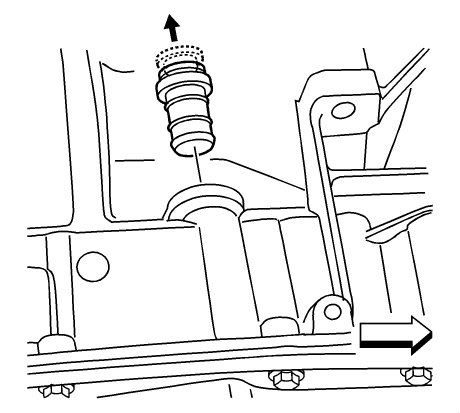
Important: It may be necessary to use a long pair of 90 degree needle nose pliers to lift the plunger and remove the plug assembly.
2. Unlock the fill tube plug by lifting the plunger. Once the plunger is lifted, remove the entire plug assembly.
3. Determine the approximate amount of fluid needed to fill the transmission, based on the repair performed. Refer to Fluid Capacity Specifications. To avoid an under-fill condition, slightly overfill the transmission, and then allow the extra fluid to drain during the fluid checking procedure.
Important: The J 45096 is being utilized as a convenient method to pump the fluid into the bottom pan. A suitable hand pump may also be used instead. When using the J 45096, monitor the display panel to determine the amount of fluid being pumped from the tool supply tank into the transmission.
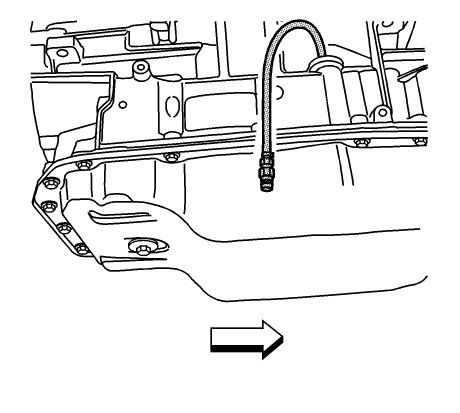
4. Using the J 45096-40 (1) and the J 45096 (2), or a suitable hand pump, add transmission fluid through the fill tube plug opening. Refer to Automatic Transmission Oil Cooler Flushing and Flow Test (J 45096) for complete J 45096 operating instructions. Use the FLOW position on the main function switch to pump the fluid.
5. Check the fluid level.
Check Plug Method
Important: When the oil level check plug is removed with the engine OFF, transmission fluid may drain from the hole.
1. Remove the oil level check plug.
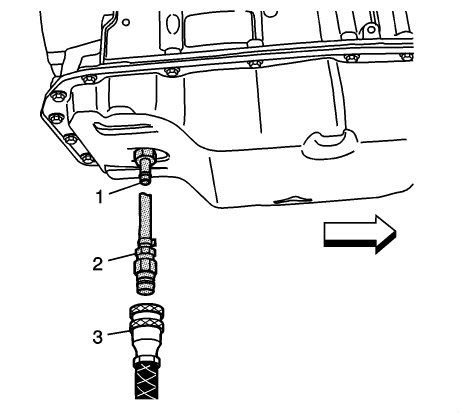
2. Install the DT 47784 (1) and, if necessary, one adapter from the J 45096-30 (2).
3. Determine the approximate amount of fluid needed to fill the transmission, based on the repair performed. Refer to Fluid Capacity Specifications. To avoid an under-fill condition, slightly overfill the transmission, and then allow the extra fluid to drain during the fluid checking procedure. Important: The J 45096 is being utilized as a convenient method to pump the fluid into the bottom pan. A suitable hand pump may also be used instead. When using the J 45096, monitor the display panel to determine the amount of fluid being pumped from the tool supply tank into the transmission.
4. Using the DT 47784 (1), J 45096-30 (2), and the J 45096 (3), add transmission fluid through the check plug hole. Refer to Automatic Transmission Oil Cooler Flushing and Flow Test (J 45096) for complete J 45096 operating instructions. Use the FLOW position on the main function switch to pump the fluid. Important: Failure to start the engine and move the shift lever through the gear ranges before removing the DT 47784 and J 45096-30 from the bottom pan will result in an excess amount of fluid draining from the check plug hole. This may lead to an under-fill condition.
5. Start the engine and move the shift lever through each gear range. Pause for at least 3 seconds in each gear range.
6. With the engine still running, remove the DT 47784 (1), J 45096-30 (2), and J 45096 (3) and then check the fluid level.
Information supplied courtesy of Alldatapro.com



 Reply With Quote
 I think you forgot a link?


