-
 Hood Release Cable Replacement Tips
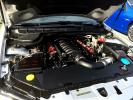
Appears my hood release cable has snapped as I took my 2008 G8 GT in for an oil change yesterday and they couldn't get the hood to pop and they also had trouble getting it to close last time. I know there's a TSB but I'm way out of warranty and the closest dealership is a pain so I went ahead and ordered Part Number 92206018 and plan to try to replace it myself when it arrives next week. Does anyone who has replaced the hood release cable have any tips or lessons learned from your install that I can leverage? Thanks in advance.
-
Moderator


I've never replaced myself, but it might be a good idea to tie a piece of string to the old cable as you pull it out. This way you can then use that string to pull the new cable back along the same path to make snaking it in easier.
Len
White Hot 2009.5 Pontiac G8 GT
TVS1900 | Custom Texas Speed & Performance cam spec'd and remote tuned by Patrick Guerra | LS9 Injectors | Rotofab CAI | Corsa catback | Kooks 1-7/8" LTs with catted connectors
-

Or if it's possible, just tape the new to the old and pull it through!
Sent from my miniaturizer via tap dancing...
2009.5 MSM GXP 500ish N/A RWHP. Mods include but aren't limited to: Texas Speed 418 (6.8L) fully forged held together with ARP from top to bottom, PRC 255cc heads, Rick Crawford intake plenum, TB port, polish and tune, Roto-Fab 102mm CAI w/LS7 MAF, Kooks 1-7/8" headers wrapped with DEI, Corsa catless system, Circle D 3200 Stall, 3.45 final drive, BMR's complete street bushing kit and sway bars, Eibach Pro Kit, G-Force Axles, running on staggered VMR 710's with Bridgestone RE11 rubber. HSV triple gauge pack with Calais smokers kit mod, V6 tails, debadge/rebadge, V6 door handles, AU black door trim, Maverick Man under hood strut covers, & washer and bolt kit, fully corrected paint thanks to Adams Polishes and my hard work. Built with reliability in mind with some power for those times when you need to pass or go over a big hill. Just a poser, not a racer!

-
VIP Member

If that happened to me I would get a repair cable the right size and run a new cable through the liner thats already in the car. then cut it to size and add the barrel on the cut end.
Seems like its going to be a pain in the A to replace the entire thing.
Just an idea but here's a pic to help you.
IMG_20140226_225236_014.jpg
-
Vendors

They are not that hard to change.
Make sure you replace or lube the latch real good too. If you choose to lube it use some penetrating spray and maybe some graphite lube after,
-
Remove the right lower fog light honeycomb
>> Reach between the radiator and the bumper and remove the plastic push clip
>> Remove the plastic cover that covers the latch mechanism you will need a
>> screwdriver to flex out the plastic to get over the retaining clip
>> Once the plastic cover is removed you can remove the cable from the
>> mechanism
>> Pull the cable into the engine compartment
>> Cut off only the hood latch end of the cable. You will use the Old cable to pull the new
>> cable into the passenger compartment do NOT remove the old cable at this
>> time
>> Pull up the positive electrical connection to allow the new cable to Slide
>> underneath
>> Remove cable from retaining clips near firewall / under the hydraulic hood lift
>>
>> Inside:
>> Remove the upper and lower dash panels (by your knees).
>> The lower dash panel is held on with two retaining screws at the computer
>> connection
>> There is a small retaining clip inside that the cable must be released
>> from. It is about 6 inches behind the release handle. Once you have that
>> lower trim panel removed you can use a flat tip screwdriver to open the
>> clip
>> Remove the cable from the release handle.
>> Tape the old cable and the new cable together inside the engine compartment and gently work/pull into
>> the passenger compartment
>> Attach the cable to pull handle first.
>> Place cable into small plastic retaining clip and close
>> Reattach all dash trim panels
>> Place cable into retaining clips near firewall.
>> Attach clip near the air filter
>> Note: my cable wore a spot through the sheathing that caused the cable to
>> rust and break. Where it wore on the bumper components I took the
>> neoprene padding off the old cable and placed it where spot was to help
>> prevent that in the future.
>> Route cable to hood release and attach
>> Reassemble all components.
>> About a one hour job.
-
Post Thanks / Like - 1 Thanks, 0 Likes, 0 Dislikes
 -Ray-
-Ray- thanked for this post


 Reply With Quote